Saturday, April 16, 2011
Stampbook Saturday - Karen
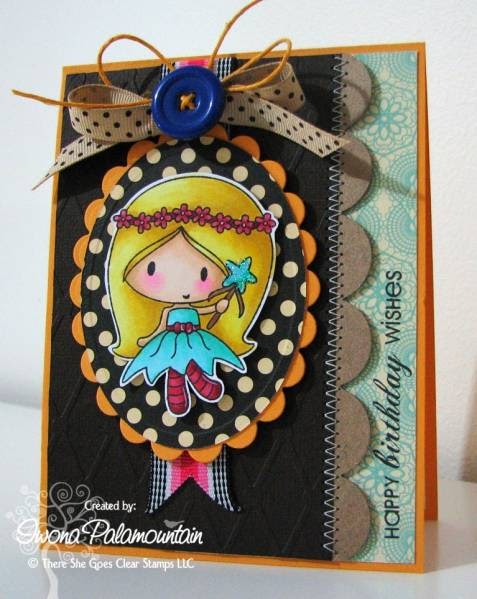
I chose to use this darling card by Iwona as inspiration -
My sweet little Katie is such a girly girl and loves all things froofy and dressy - so this little fairy from Fairy Good Day is absolutely perfect.
I used the same paper pack as Iwona - The Thrift Shop by October Afternoon and stamped the fairy in Memento Tuxedo Black and colored her in with Copic markers. I also added a little glaze accent on her wand and the centers of the flowers in her hair. The tags are printed off the computer using CK Marissa font and I just tucked them underneath the button bow. The page measures 8x8.
Thanks so much for stopping by!
Karen
recipe -
stamps: fairy good day (there she goes)
paper: ruby red (su!), aqua mist (pti), kraft (pti), basic black (su!), choice buttercream (taylored expressions) cardstock, the thrift shop (october afternoon)
ink: memento tuxedo black
accessories: large scallop border die (taylored expressions), medium scallop border die (taylored expressions), neutral buttons (su!), bakers twine, aqua satin ribbon, glaze pen, copic markers, dimensional tape, ck marissa font
Friday, April 15, 2011
Dollar Find Friday and Friday Night Chat!

Today is my turn to do the Friday Dollar Find deal for the There She Goes blog. My find was this adorable little basket from Michael's $1.50 bins -- which are the $1.00 bins in the US Michael's stores. For some reason the price jumps by 50% when they cross the border into Canada!
I decided to turn my find into an Easter basket for my daughter. She loves pink so I made eight little tissue flowers in two tones of pink (see Wednesday's post here for the tissue flower tutorial) and stuck them around the edges of the basket with glue dots. Then I wrapped some thick, white satin cording I've had for ages around the handle and added a little bow with a button for a little something.
The bunny is made from the following punches:
- Stampin' Up large oval punch (ears)
- Stampin' Up small oval punch (ears)
- Two different sized Nesties (for head and body)
- A 3/4" circle punch (cheeks)
- 1/4" punch (nose and eyes)
Thanks for stopping by today, and have a fabulous weekend!
Marisa~
Thursday, April 14, 2011
Trendsetting Spotlight on Katie and Anita!
Look at how gorgeous this Easel Card is using Puppy Love by Katie!!! She did a great job and really got into the TSG101 Challenge, Round and Around Challenge!
If you'd like to see more of Anita's fabulous artwork, hop on over to her blog, Cards and Coffee!
Tuesday, April 12, 2011
Wednesday Trends ~ Tissue Flowers
Flowers on cards are a big trend these days, so today I’ll be showing you how to make some of your own.
TISSUE FLOWERS:
This idea is not my own. I saw them on Dawn McVey’s blog a few years back and loved making them so I thought I’d share how to make them with you.
Tissue flowers are very easy to assemble and make a wonderful statement on your card. So hang on to that tissue paper you get in your gifts or with your flowers J It doesn’t matter if it’s wrinkled as the wrinkles add wonderful texture to your flower!
The supplies you will need to make a tissue flower are as follows:
- A scalloped circle punch (or scalloped circle Nesties)
- Tissue Paper
- A brad
Take your tissue paper and fold it over so it is eight (8) layers deep.
Then punch through all eight layers at once with your scalloped punch, making sure to keep the layers together once you have punched them out. If you don’t get a clean punch, don’t worry, a few torn edges add a wonderful shabby feel to your flower! 
With a push pin or paper piercing tool, make a hole in the middle of the stack of tissue flowers and insert and fasten a brad. 
Starting with the first tissue layer, scrunch it up around the brad. Then take the second tissue layer and scrunch it around the first one. Continue the process until all the layers have been scrunched.
Then all you need to do is gently play with the layers until you get the desired “poofiness” and shape to your flower. A paper piercing tool or toothpick work great for this part.
If you want to make a flatter flower you can add a decorative button or brad to the middle.
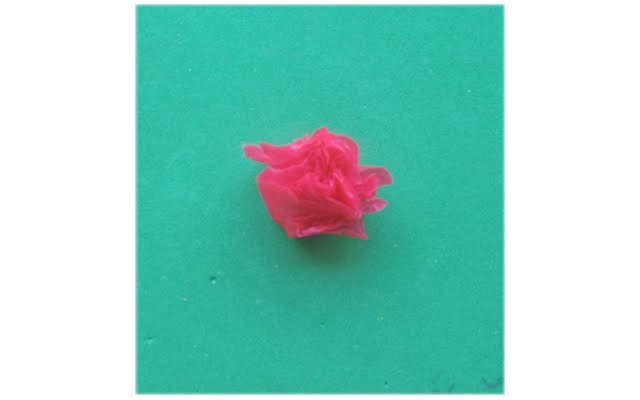
Here’s a quick card I made using a tissue flower on it.
PAPER FLOWERS:
You can also use this technique to make paper and cardstock flowers. Simply punch out eight scalloped circles. If you are using white cardstock a nice option is to sponge the edges of all eight scalloped circles.
Then mist each circle with water and individually scrunch them up. Them ore you scrunch them the more you soften then.
Then gently unwrap each one and stack them up on top of each other, and adhere them with a brad in the center as you did with the tissue flowers.
Just like the tissue flower, begin by scrunching the first layer to the middle around the brad and continue to do the same with each consecutive layer.
Once completed, gently open the flower until you achieve its desired look and set aside for the paper to dry. You can spray some glimmer mist on it or the like at this point if you like. Once the flower is dry it will hold its shape wonderfully.
Trendsetter Tuesday-Marisa!
My name is Marisa. Some of you know me as Whiterockmama on SCS. I have two amazing children and a wonderful husband. Over the past few years I have enjoyed challenging my "one creative gene" to new heights and welcome you to join me in my card making journey.
I found some trendy goodness on Marisa's blog, Rosemary Reflections.
Here is a gorgeous card using the Sweet Pea floral stamp set. I just love how Marisa colored the centers and graduated to light on the petals. The white panel brings sophistication and elegance, while the sheer bow and heart lend softness and sweetness to this card.
This circle card for last week's Monday challenge is soooooo cute and funny!! I love the popped up gnome and mushroom house from the My Little Friend stamp set.
Last but certainly not least was one of my favorite sneak peeks for Chris Dark's Tulip stamp set. Look at how gorgeous this card is!!! The colors, embossed background and all are just stunning!!
Now hop on over to Marisa's blog, Rosemary Reflections, to see more beautiful crafting, and be sure to leave her some love.
Sunday, April 10, 2011
TSG102 ~ Vivacious Vellum ~
This week’s challenge is brought to us by this month’s Trendy, Marisa! It’s time to pull out that rarely used, but always elegant vellum. There are all sorts of techniques you use that will showcase the vellum stunningly, or you can simply stamp the vellum as use it as a focal panel…your choices are limitless! We can’t wait to see what you come up with!
To be eligible for the giveaway, you are to create a card that utilizes vellum, and then come back to the TSG Blog to add your name and a link to your project in the InLinkz that is located at the bottom of this challenge post. This challenge is open until the winner has been announced on the following Monday (Apr. 18th). The winner will get a $5 gift certificate to use in the TSG Web store!
By participating in this challenge, you may also find yourself in the Trendsetting Spotlight that shines on the TSG Blog every Thursday. We will be on the look out to find challenge cards that stand out and show Trendsetting qualities. TSG stamps are not required to participate in the challenges but are appreciated :)
You do not need to have a blog to be able to participate in the TSG Challenges! You can simply add the URL link from your project after it has been uploaded to your online craft gallery. If you upload your card to an online craft gallery, please use the keyword TSG102 so we can check out your beautiful work!
Need some inspiration to help you get started? Check out these great cards made by the following Trendsetters
~ Marisa
~ Holly
Week In Review (April 4 - April 10) & Card Give Away
Winner from last week's WIR: Cathy
Random Integer Generator
Here are your random numbers:7
Timestamp: 2011-04-11 20:26:42 UTC