What is a Stampbook Page? A Stampbook Page is a scrapbook page created using stamps and inspired by a card. Each week we create a new Stampbook Page to give you ideas on how to use your stamps in a new way and hopefully inspire you to catch up on those family photos that you've been meaning to scrapbook ;)
This weekend is going to be a bit different then other Stambook Saturday posts. Usually the Stambook Page is inspired by a card and incorporates stamping. This week I want to share a photo project with you that I created for my daughter's teacher as a thank you gift for a great school year.
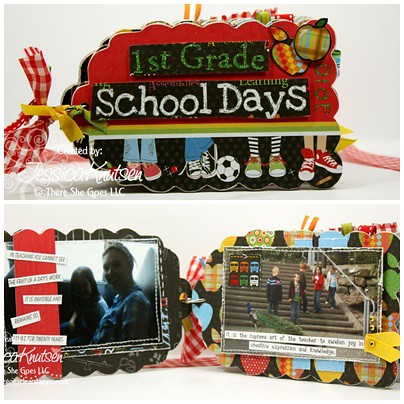
I found this awesome tag book for $1 at Michaels awhile back and even though I didn't have any immediate plans for it, I just had to have it! I am so glad that I bought it because it worked perfect for this project. I also picked up a new 8x8 paper pack made by DCWV called Grade School that has a bunch of fun, bright colors that made me happy.
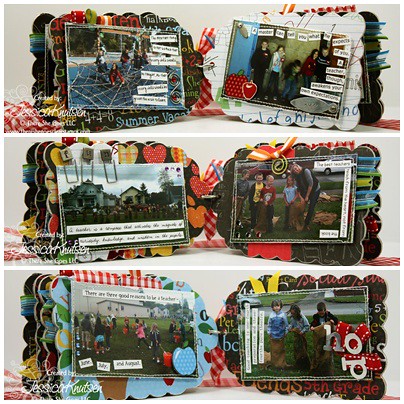
All of the pictures that I used were ones that Matt had taken with his cell phone during field trips and other volunteer work that he did at the school this year (I know, isn't he great?:) So the quality of the pictures aren't the best but it's definitely the thought that counts! I also made the teacher a bag that was decorated with different iron on transfers that matched a shirt that I made for Kylie so that she could have all of her classmates sign it.
I was able to create this entire project in just one evening! Here are the basic steps for the tag book-
*After pictures are chosen (I used 8 for this tag book) crop to 2.75x4.5 in., distress edges, stitch with sewing machine.
*Type up your picture captions on Word using different fonts (I chose to use different quotes about teachers/teaching)
* Take ring off of tag book so that you are able to alter each page separately.
*Trace the outline of the tag twice onto coordinating DP's (once for each side). Repeat for all tags.
*Cut out DP, adhere one side at a time (I used a combo of tape and glue stick) and use a craft blade to trim off the excess paper. Repeat on other side.
*Using sand paper (I used my handy dandy Dremel- love that thing!) sand the edges of your covered tag to smooth cardstock edges.
*After you have all of your tag pages covered with DP, you can add your pictures and other embellishments.
*Let dry and put pages back on ring.
I did not buy any new products to create this fun book except for the paper pack. I used things that I already had on hand- a perfect way to use up some of those neglected random embellishments ;)
I added different colored ribbon to some of the pages as well as the tag ring. I like how this helped to tie all of the different colors together. *No pun intended* ;)
And here is the final project-
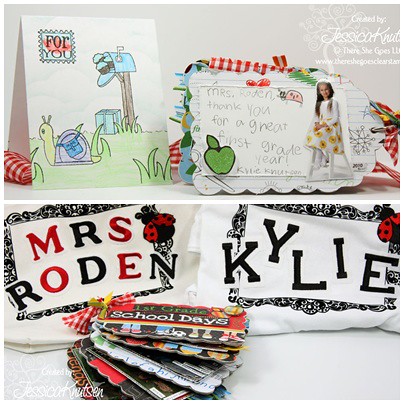
For the last page of the book, I had Kylie write a thank you
note before I added her picture and an apple. Kylie wanted to make a card as well so she told me which stamp sets she wanted and I put the scene together for her :) (Made with Special Delivery and Slow & Steady)
Here is the tag book along with the decorated shirt and bag.
I hope you all enjoyed my project!
Make sure you come back tomorrow for some big news!!!
Have a great weekend :)


Wow! Jessica, this is an awesome project! Kylie's teacher must be thrilled to receive this wonderful momento of this school year. I'm amazed you were able to create this in one evening!! I sure would like to take lessons from you! BTW, I'm heading to the Puget Sound region is just over a week. I'm so excited to leave the heat of Arizona for the cool of Washington. I'll try to bring a some of the sunshine with me but not the 100 degree temps! LOL
ReplyDeleteBig news? Do I need to be scared again? :( How precious is this project though? Oh my gosh!!
ReplyDelete~Meredith