
Hi there! Tobi here and it's my honour to show you a few tips I have for "grounding" an image or making a scene with your stamps. It is wonderful that so many people have jumped on the colouring bandwagon and I love seeing everyone's unique approach, and something that has become more popular lately is adding flair to the background of your image, and today we'll talk about the GROUND! Sound fun? It is!
I used stamps from My Little Friend to demonstrate 3 different techniques:
1) Adding a line behind your image to create a ground.
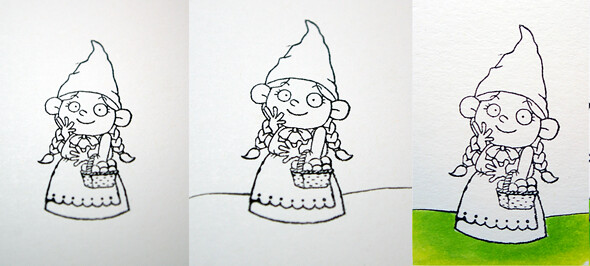
You can see in the first photo that she's just....floating. I use a Copic multi-liner to add a wavy ground behind her and then I can colour it in as I see fit! Or leave it blank.. Either way!
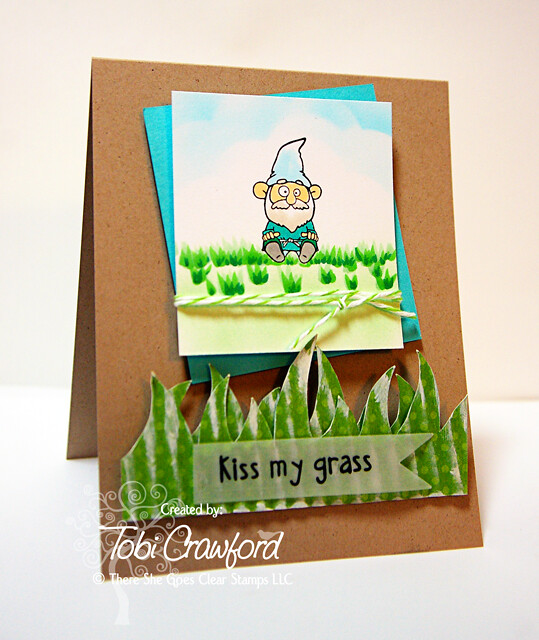
2) Use a flicking motion with your Copics to draw grass:
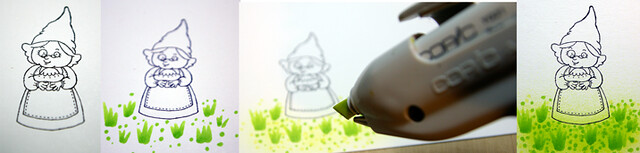
I started off with the darkest colour and drew in blades of grass and dots. Then I did the same with the medium colour. Then I airbrushed the lightest colour and a touch of the medium to finish off the look. *edited to add: you can get a similar/the same look with green ink and a sponge.. This is just the quick way!
Here's a card I made where I didn't add dots... It's your choice.
3) Using a swoop (very technical term here, sorry...) of grey for the ground:

Grey is useful when you don't need to be specific about what kind of ground you want.
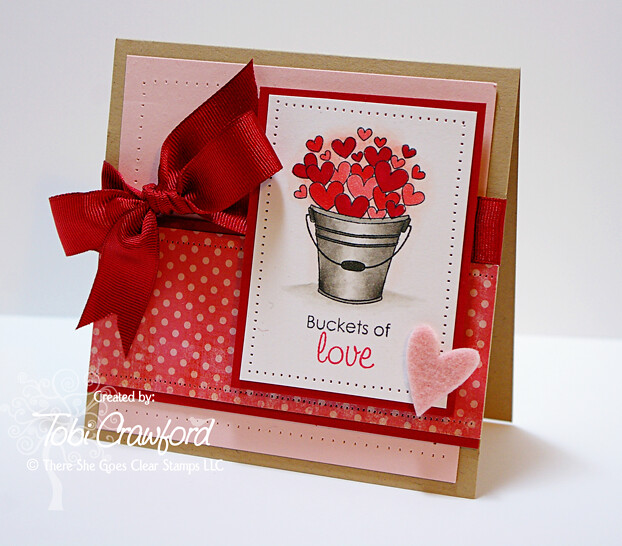
You can see the faint grey behind the bucket that just helps to set the scene... (Image from Buckets of Love)
I hope you enjoyed the demo. Why don't you give it a try!? You'll love what it adds to your colouring.


Thanks for this, my images are usually floaters, lol!
ReplyDeleteWonderful tips and examples!
ReplyDeleteAny suggestions for those of us who don't own an airbrush machine? My "ground" is usually a few horizontal streaks...blah!
ReplyDeleteYes! Use a sponge with green ink and you get the same effect!!
ReplyDelete