
Hi, Debby here and today I'm going to look at making your own envelopes. We spend a lot of time and effort on our card fronts, some of us even spend a chunk of time and love on the insides of our cards but what about those first impressions - the envelope? We may not always like it, but we all know that first impressions count!
So to start off wtih today I'm going to look at making a custom envelope. I don't think I'm the only one that gets carried away in the card making process and ends up with die cuts hanging over the edge of the card making the card too big for a standard envelope! There are lots of tutorials out there but I'm just going to put into pictures the way that I do it. This method allows me to make envelopes to any size. Then to finish I'm going to take a quick look at spending just a few minutes to dress up the finished envie.
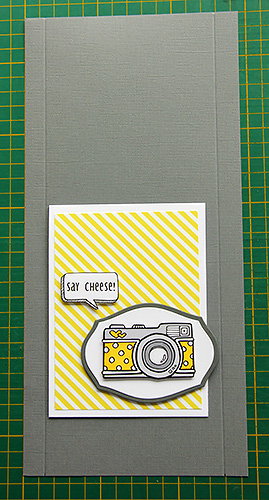
I chose to work with this card using the Oh Snap! stamp set.

When I made this card I used a die cut which overhang the right side of the card making it too big for my envelope. I chose to use grey bazzill card for the envelope for two reasons - the 12 x12 size gives me that bit of extra length for my envelope and the grey colour makes the score marks I make show up better for these photos.
Using the full 12 inch length of the cardstock, cut a width 4cm wider than your card.

Score the full length of the cardstock on each side leaving just a little larger space in the centre than your card width.
Score across your cardstock above and below your card leaving a small space either side. The top section becomes the flap, the middle section becomes the front of the envelope and the lower portion becomes the back of the envelope. You will see in a minute!

Cut away the four long thin rectangles from the corners of the cardstock.

Round all the corners apart from the bottom two. You will need to fold the top flap and bottom section to get access to the corners on the thin side pieces.

Cut a piece of patterned paper as a decorative liner and add to the inside of the envelope only glueing to the envelope flap. This allows for the liner to shift up and down slightly as the flap is opened and closed and stops bunching of the cardstock.

Check that your card snuggles nicely in the well of the envelope.

Add scortape to the inside two sides of the bottom section.

Fold in the two thin side flaps and remove the liner from the scortape. Fold up the bottom section so it sticks to the two flaps. Voilà you have an envelope!

You can add a piece of scortape to the flap to seal the envelope or as I did here wrap a bit of twine around to keep the envelope closed. It looks cute and means the envelope can be used again. I also added another image from the Oh Snap! stamp set as a label on which to write the recipients name.

And here's the two together.


This comment has been removed by a blog administrator.
ReplyDeleteThanks for the great tutorial, Debby! I'll give it a try!
ReplyDeleteThanks for sharing Great work..
ReplyDeletePlastic cards
What a fabulous tutorial and love the envelope!
ReplyDeleteLove it... what a great tute!!
ReplyDeleteGreat tutorial Debby. Thanks for sharing.
ReplyDeleteGreat tutorial, Debby! You made this look super easy.
ReplyDelete