Some essential tools I use to watercolor are ink pads (SU, Distress Inks, etc), reinker bottles, an aquapainter brush and watercolor paper. I stamp my images using StazOn because it's waterproof. To use the reinkers, I have a small inkwell dish that painters use to leave a few drops of each color in. A few drops goes a long way, and they don't dry up like acrylic paints do, so you can leave them this way for a long, long time!
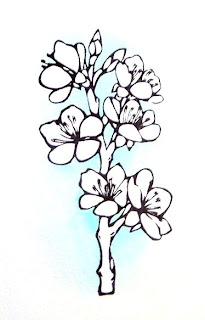
 Step 1:- I don't always remember to, but it's a good idea to color the area around the image first. That way you won't cause the colors in the image to bleed into the background and ruin all your hard work! Before you start, make sure that your brush has enough water on it to bleed the background color out so there are no visible ink lines. It shouldn't be dripping wet, but just enough to leave a wet stroke. I usually work with a scrap piece of cardboard underneath my image to test the brush wetness and to wipe off any excess ink.
Typically I use SU's Cool Caribbean ink for my background color. Squish the lid and the inkpad together to leave ink on the lid, then ink up the brush with a couple of swipes over the ink in the lid. I find it best if I paint in a horizontal direction, so I will rotate my image constantly so I can work this way. You want the most ink closest to the image, so start there and work your way across the area moving the brush left to right and working away from your image. Once you've done that, quickly wipe off any excess ink on your scrap cardboard and brush over the edges of your brushstrokes to eliminate any ink lines.
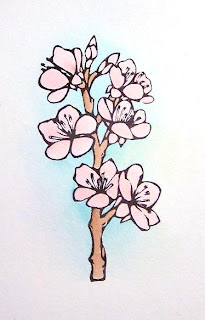
 Step 2:- Now you're ready to color in the image. Apply a light wash of color over the areas to get a base coat on them. Remember, you can never remove color while watercoloring, so start off light and apply layers of color until you're happy with the look. Wait for the image to dry before you apply your next layer otherwise your image will be so wet your colors won't stay where they're supposed to! I usually like to apply two layers of color to areas.
 Step 3:- Now you can apply your third layer of color to the darker or shadow areas of your image. For this step your brush should barely have any water on it. Wipe off excess until there is barely anything left but you might find that the brush has naturally dried up because of all the coloring you've done already.
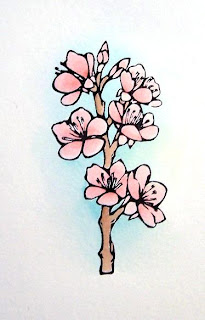
Ink up your brush with more ink than you did previously. You won't be using all of it because it's the color intensity you want, not the quantity of ink. Then apply the ink to the areas that are shadow areas or, like with these flowers from TSG's Bloom set, to the areas you want the most intense color. Again, starting in the area you want the most color and working your way out from it in a left to right motion away from the starting point. This time, because you already have color laid down, you don't want to stop your brushstrokes midway through the area because you'll leave bleed lines, so work your brush over the entire area to re-wet it. That way it'll dry evenly.
For smaller areas, like these petals, or if your shadow areas are smaller, apply the ink to a small section of the area, then as we did for the background color, quickly wipe off all ink from the brush and rework the newly applied ink until it blends into the existing layers of color. (I hope that makes sense!) This way, you will get the color intensity you need but only to the areas that require it.
 Step 4:- This is the last step and it really adds a lot of dimension to your images.
To really bring out the shadow areas and make the images more realistic, you can apply a darker hue of the same color you're using to the shadow areas. For example, I used SU's Pretty In Pink for the flowers and for the shadows and centers I used a teeny tiny bit of Regal Rose. If I was using SU's Morning Marigold, then I'd use a combination of More Mustard and a teeny tiny bit of Really Rust. It's all about showing a gradation of color.
Remember to blend all the layers of color and you can't go wrong!
And here's the final image on a finished card.


I was wondering after I read your profile from yesterday how exactly you watercolor so this is perfect for today! I don't own a wide variety of ink colors but I would give it a try. There are so many types of ink -- does it matter if you you Staz-on, alcohol based, etc? I know it matters with Copics.
ReplyDeleteThanks for the tutorial!
GREAT tutorial, Thanks
ReplyDeleteFabulous tutorial Sandra (now I know your secrets- wink!) Beautiful card too!!
ReplyDeleteThank you so much! Would love to try :)
ReplyDeleteThank you so much for sharing your process with us! I am always amazed by your beautiful water coloring :)
ReplyDeleteI just love your coloring technique! Thank you for sharing
ReplyDeletea wonderful tutorial!
Wow that was awesome, going to try that.
ReplyDeleteIm very impatient and dont wait for it to dry before reapplying and get bleeds eeek nightmare!
Kristy